About This Pattern
As I finished up my last semester of college, my mind shifted from a textbook state-of-mind to a more creative one. I’ve always wanted to create a pattern of my own, but if my lack of confidence didn’t deter me, my lack of time did. But now that a huge chapter of my life was coming to a close, I had not excuse!
As I wrote out this pattern I realized how much math and logic went into pattern design. Creating a design that was beautiful yet practical is harder than it looks (kudos to all the pattern designers out there!). But after countless drawings, calculations, and swatches, the pattern came together.
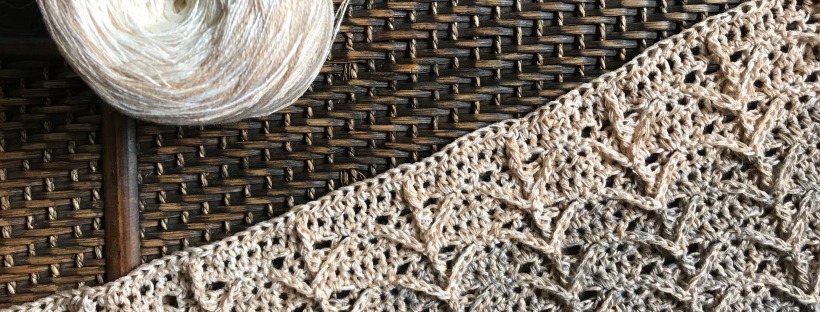
This pattern looks quite fancy but is a relatively simple four-row repeat with stitches most intermediate crocheters already know. I gave it its name because the little arms look like they’re reaching up to touch the heavens. Plus, I created this pattern during a point in my life where God answered one of my biggest prayers: to graduate from college!
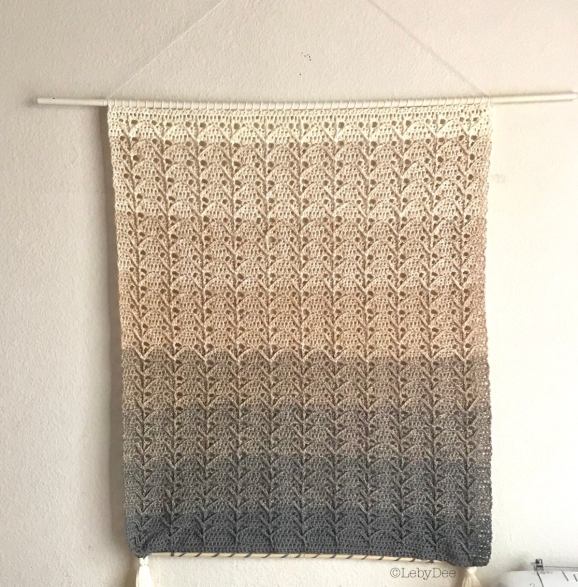
This stitch pattern is versatile, and can be used with any yarn and a matching hook. You can use it to make pillows, scarves, wraps, wall decorations, and anything else you can think of!
Materials
- Any yarn of your choosing
- A hook to match the yarn’s weight*
* The piece should naturally lay flat as you work the pattern repeat. If you find your work curling up after 3 repeats, consider go up a hook size or two or relaxing your tension.
Stitches to Know and Abbreviations
- Foundation half-double crochet (fhdc)*
- Front-post double crochet (fpdc)
- Back-post double crochet (bpdc)
- Chain (ch)
- Half-double crochet (hdc)
- Single crochet (sc)
- Slip Stitch (slst)
- Stitch (st)
Pattern
*Fhdc tutorial: https://www.mooglyblog.com/foundation-half-double-crochet/
* The ch1 at the beginning of each row does not count as a stitch.
* Remember when you fpdc or bpdc the stitch that you would have worked in the previous row is skipped.
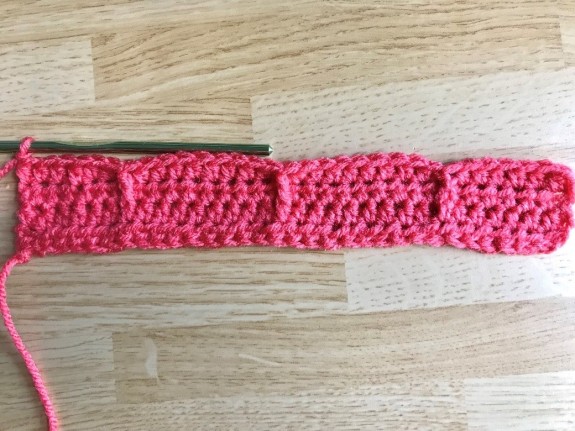
Row 1: Fhdc a multiple of 9+4, ch1, turn.
- For example, fhdc a multiple of 9 like 27, 54, 81, etc, then add 4 more stitches
- Note: Your stitch count should be in multiples of 9+4. When some people fhdc, they count the starting chain as a stitch, while others don’t. This could lead to an incorrect starting stitch count. Regardless of which method you use, just make sure your first row has a stitch count in a multiple of 9+4.
Row 2: Hdc in each st across. Ch1, turn.
Row 3: Repeat Row 2. Your stitch count should be the same as when you began.
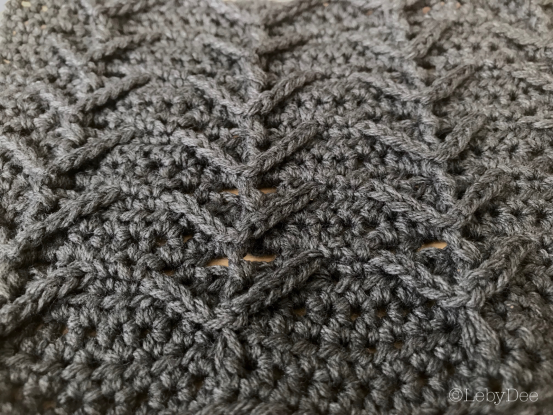
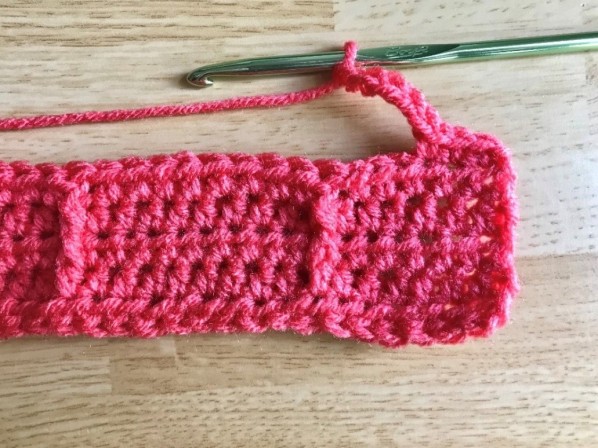
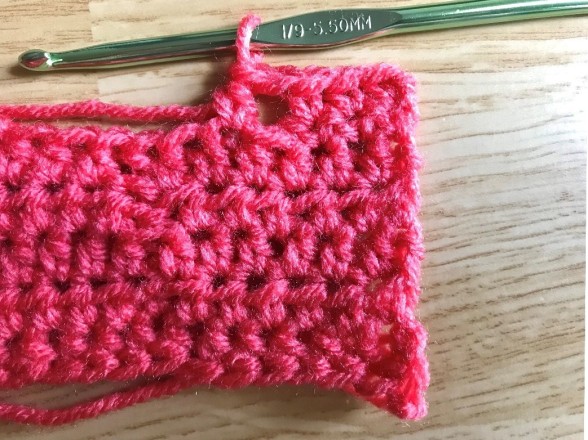
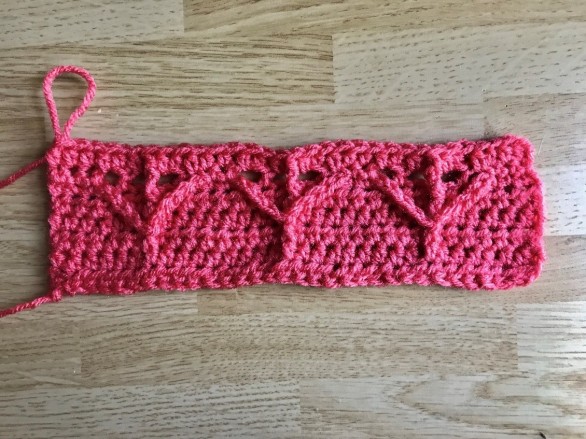
Row 4: Hdc in the first 6 st, make one fpdc around hdc two rows below, (hdc in the next 8 st, 1 fpdc in hdc two rows below), repeat () to last 6 st, hdc in last 6 st. Ch1, turn.
Fpdc around corresponding hdc 2 rows below
Row 4 complete
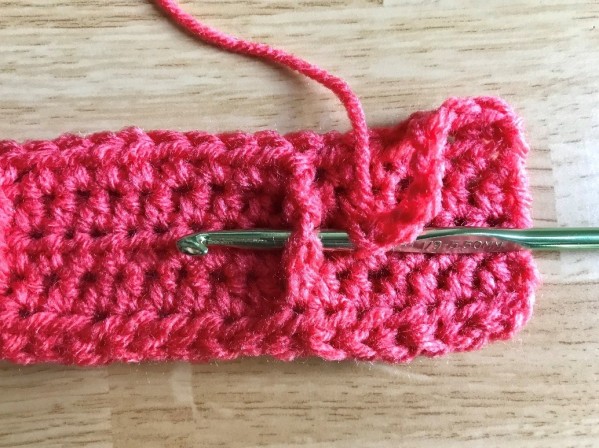
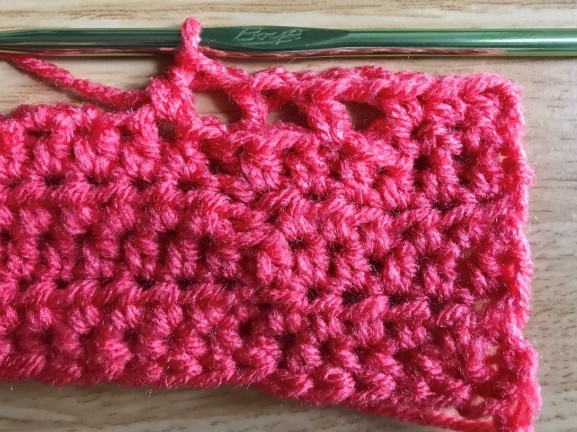
Row 5: Hdc in first 6 st, (1 bpdc around fpdc made in previous row, hdc in next 8 st), repeat () to last 7 st, bpdc around fpdc made in previous row, hdc in last 6 st. Ch1, turn.
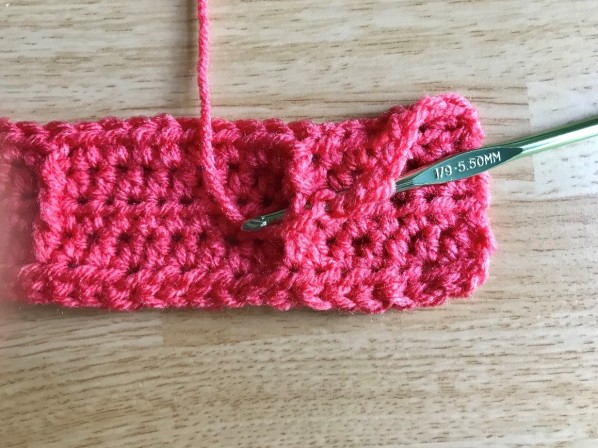
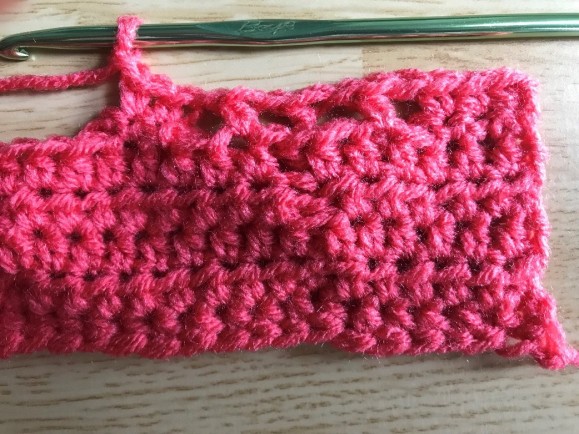
Row 6: Sc in first 3 st, (ch 5, slst around fpdc beneath the bpdc made in previous row, ch5, skip 7st, sc in next 2 st), repeat () to last st, sc in last st. Ch1, turn.
Sc in first 3 st, ch 5
Insert hook beneath the fpdc below the fpdc of previous row.
Slst around post by yarning-over and pulling hook through loop on hook.
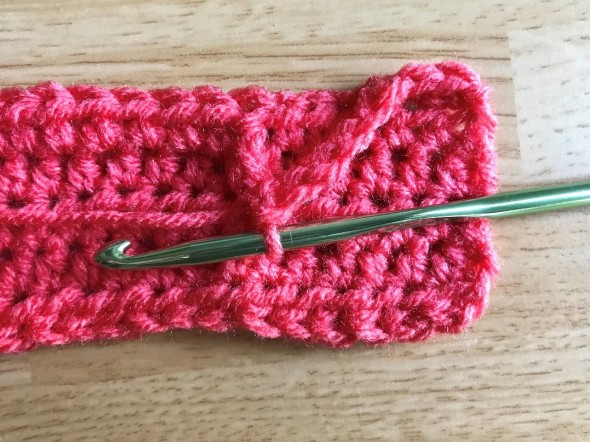
Slst complete
Ch5
Skip 7 st and sc in next 2 st
Row 6 complete
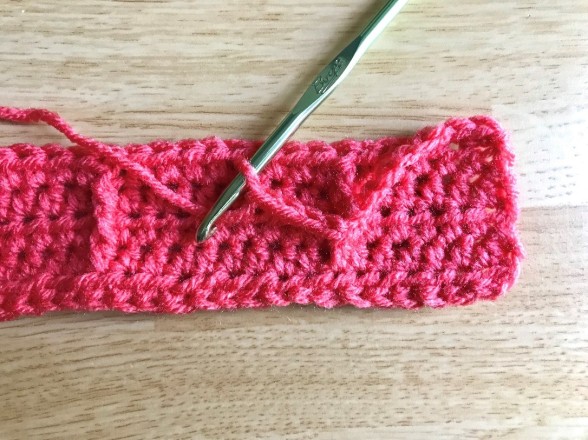
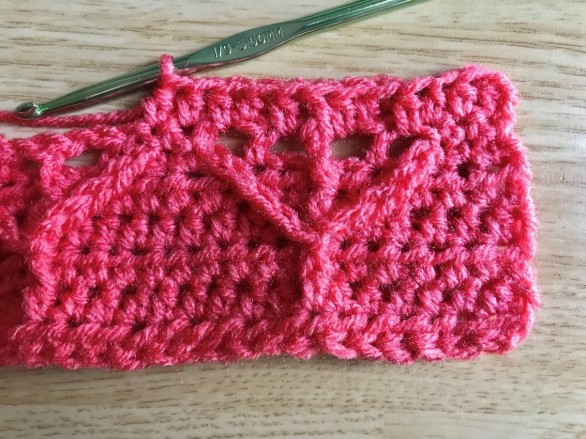
Row 7: Sc in first 3 st, (ch1, working into the st made in the row below: skip 1, hdc, ch1, bpdc around fpdc made two rows below, ch1, skip 1, hdc, ch1, skip 1, sc in next 2 sc), repeat () to last st, sc in last st. Ch1, turn.
Sc in first 3 st, ch1, skip st, hdc in hdc made in row below, ch1, skip 1 st
Bpdc around fpdc made 2 rows prior, ch1, skip 1 st, hdc in hdc below
Ch1, skip 1 st, 1 sc in each of the next 2 sc. 4 holes were made.
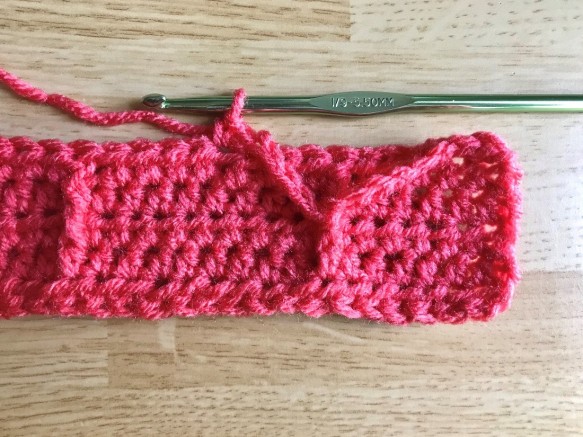
Row 8: Hdc in each st and ch1 space, and fpdc around each fpdc (a.k.a each bpdc made in the previous row). You should have the same number of stitches as you started with in your foundation row.
* Be sure not to miss the ch1 spaces between the sc and hdc of previous row.

Hdc in first 3 st, hdc in ch sp, hdc in next st, hdc in ch sp, fpdc around fpdc, hdc in ch sp, hdc in next st, hdc in ch sp, hdc in next 2 st, etc.
You did it!
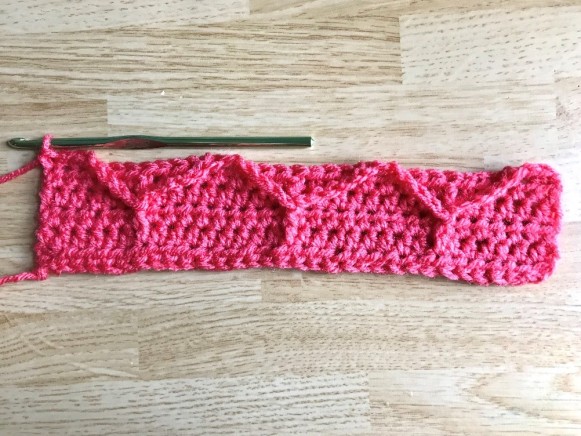
Repeat rows 5 – 8 until you have desired length. Then repeat Row 2 and bind off.
I would be thrilled to see anything you create using this pattern! Feel free to send me a photo via email (lebydeecreations@gmail.com) or via social media!
You can find me on Instagram as @lebydeecreations, on Ravelry as Debbycakes, and on Pinterest as LebyDee Creations.
Copyright and Terms of Use
With this pattern you may not:
- Republish as your own work in any way, shape, or form
- Modify and then republish this pattern. Modifications on personal crocheted pieces are okay
- Sell this pattern, modified or not
- Take the photos or images for use in your own patterns or work
You may:
- Sell any finished object that uses this pattern
- Share this pattern via the blog’s link only

I love the texture that the stiches create. Beautiful!
LikeLike
Thank you!
LikeLike
Very clever pattern. Can’t wait to try it!
LikeLike
Thank you. I’d love to see what you make with it when you are done!
LikeLike